City Run 3 Strategy Guides
Welcome to the City Run 3 Strategy Guide hub — the most comprehensive collection of in-depth walkthroughs, optimization strategies, and advanced techniques for the neon-drenched parkour runner City Run 3. Whether you are strapping on your running shoes for the first time, struggling to break into the leaderboard top 100, or hunting for every hidden level the metropolis has to offer, the six guides on this page have been crafted by top-ranked players with thousands of combined hours carving through the neon streets. Every strategy has been battle-tested, every timing verified frame-by-frame, and every recommendation backed by scoring data.
Our guides are updated continuously to reflect the latest game patches, balance changes, and community discoveries. If you spot outdated information or have a strategy suggestion, we welcome your feedback through our Contact page. Now lace up, sync your playlist, and let us turn you into the runner the neon city never saw coming.
Novice Complete Guide — Your First Steps on the Neon Streets
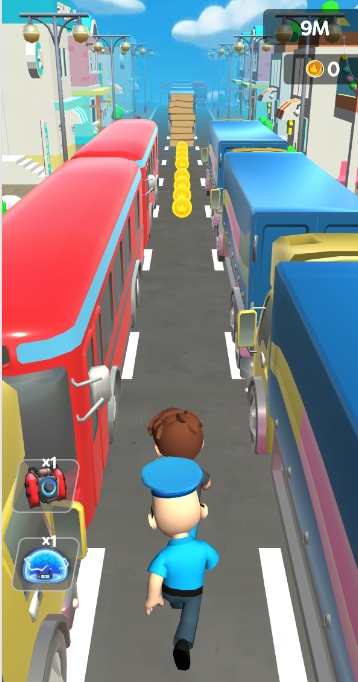
Starting City Run 3 can feel overwhelming. The screen floods with neon lights, obstacles rush at you from three lanes, and before you know it you have face-planted into a barrier for the fifth time. Take a breath — every top-ranked player started exactly where you are now. This guide walks you through the complete new-player experience: understanding the interface, mastering basic controls, executing a proven first-10-minutes action plan, and avoiding the five most common rookie mistakes that hold new runners back.
Understanding the Game Interface
Before you take a single step, familiarize yourself with the HUD (heads-up display) elements that track your run in real time. The Score Counter sits at the top-center of the screen in bright cyan neon digits, updating continuously as you collect coins and chain combos. The Coin Counter appears directly below the score in gold, tracking your in-run currency collection — this is separate from your permanent coin balance shown in the main menu. The Distance Meter occupies the top-right corner, measuring your run length in meters with a progress bar that fills toward your personal best.
On the left side of the screen, the Power-up Slot displays your currently equipped active item with a cooldown indicator (a circular timer that sweeps clockwise). Below it sits the Combo Multiplier — a pulsing number that grows from 1x to 10x as you chain consecutive collectibles. When the multiplier glows pink, you are approaching the cap and should prioritize not missing any pickups. At the bottom of the screen, the Lane Indicators — three subtle glowing lines — show your current position (left, center, or right lane). The center lane glow intensifies when you are aligned.
The Settings Panel, accessible from the pause icon in the top-left corner during a run, lets you adjust sensitivity (how responsive swipes feel), toggle vibration, and enable or disable the tutorial hints that appear during your first few runs. Sensitivity is personal preference, but most competitive players set it to 75% — responsive enough for quick reactions without registering accidental swipes. The Character Selection Screen, available from the main menu, shows your unlocked runners with their stats (Speed, Agility, Jump, and Combo rating out of 100) and lets you equip up to three power-ups before starting a run.
Basic Controls: Swipe, Slide, and Soar
City Run 3 uses an intuitive swipe-based control scheme designed for one-thumb play. Here is every input you need to know:
- Swipe Left / Right: Switches your runner between the three lanes. The transition is nearly instant (roughly 0.15 seconds), but during that window you cannot perform another action — plan lane changes slightly ahead of obstacle clusters.
- Swipe Up: Jump. Hold the swipe to jump higher — a quick flick clears low barriers (about 1.5 meters), while a sustained upward swipe launches you over tall obstacles and gap jumps. Jump height also scales slightly with your character's Jump stat.
- Swipe Down: Slide. Your runner drops into a slide that lasts about 1.2 seconds by default, passing under low-hanging barriers and through narrow gaps. You can extend the slide by holding your finger down on the screen after swiping — useful for sequences of back-to-back low obstacles.
- Double-Tap: Activates your currently equipped power-up. The double-tap registers anywhere on the screen, so you do not need to aim for a specific button — just tap twice rapidly with your free thumb.
- Wall-Run: When your runner approaches a wall on the far left or right lane, swipe toward the wall and hold. Your runner will run along the vertical surface for up to 3 seconds (extendable with the Agility stat and certain power-ups), collecting wall-mounted coins and bypassing ground obstacles. Releasing early drops you back to the lane.
Your First 10 Minutes: A Proven Action Plan
The first 10 minutes of City Run 3 set the trajectory for your entire progression curve. Follow this step-by-step sequence to maximize your early-game foundation:
-
Complete the Tutorial
Launch the game and select "New Game." The tutorial guides you through each basic control with on-screen prompts. Pay attention to the wall-run section — it is the mechanic most new players struggle with. Claim your 500-coin completion bonus immediately after. Time: ~3 minutes.
-
Explore the Main Menu
Before your first free run, spend 2 minutes navigating the menu. Open Settings and set sensitivity to 70-80%. Visit the Character screen to view your Default Runner's stats (Speed 50, Agility 50, Jump 50, Combo 40). Browse the Shop to see available power-ups — do not buy anything yet, just familiarize yourself with what Magnet, Shield, and Speed Boost do. Time: ~2 minutes.
-
Run Your First Free Run
Start a run without any power-ups equipped. Focus purely on the basics: stay alive, practice lane switching, and get comfortable with the timing of jumps and slides. Do not worry about coins or score. Aim to survive at least 500 meters. Expect to crash out 2-3 times — this is normal. Each crash teaches you the obstacle patterns. Time: ~3 minutes across attempts.
-
Equip Your First Power-up and Collect Daily Rewards
After your first real run, visit the Daily Rewards screen (the gift icon on the main menu) and claim your Day 1 login bonus — typically 100 coins and a small XP boost. Then equip the Magnet power-up (unlocked by default) in your first power-up slot. The Magnet automatically attracts nearby coins within a 3-meter radius, dramatically increasing your collection rate without requiring precise lane positioning. Time: ~1 minute.
-
Run with Magnet and Target 1,000 Coins
Start a second run with Magnet equipped. This time, focus on collecting coins while surviving. The Magnet pulls in coins from adjacent lanes, letting you focus on dodging obstacles. Your goal: accumulate 1,000 coins in a single run. With Magnet, this is achievable within 600-800 meters for a new player. Spend those coins on the Combo Multiplier Upgrade Level 1 in the shop (cost: 800 coins) — this permanently increases your combo cap from 10x to 12x. Time: ~2 minutes.
5 Common Rookie Mistakes and How to Fix Them
Every new City Run 3 player makes these mistakes. Recognizing them early saves hours of frustration:
1. Tunnel Vision on Coins. New players fixate on the shiny gold coins and steer directly into obstacles. Coins are important, but survival is paramount — a dead runner collects nothing. Train yourself to scan the road ahead for obstacles first, then glance at coin placement second. With Magnet equipped, you will collect most coins passively anyway.
2. Panic-Swiping Under Pressure. When obstacles appear in rapid succession, the instinct is to swipe frantically in multiple directions. This causes "input queuing" — the game registers multiple swipes and executes them in sequence, often sending you straight into the next obstacle. Instead, practice the "one-swipe, one-obstacle" rule: each swipe should address exactly one obstacle. If two obstacles appear simultaneously, prioritize lane-switching over jumping — lane changes are faster and leave you less vulnerable.
3. Ignoring Daily Quests. Daily quests are the most XP-efficient activity in City Run 3, rewarding 500-1,500 XP for tasks as simple as "run 1,000 total meters" or "collect 200 coins in one run." Check your quest log before every play session and prioritize quest-aligned activities. Completing all five daily quests takes about 20 minutes and provides more XP than an hour of unfocused running.
4. Spending Coins on Cosmetics Too Early. The shop sells flashy character skins (2,000-5,000 coins each) that provide no gameplay benefit. New players who buy the Neon Glow skin before upgrading their Combo Multiplier or power-up slots are delaying their progression by days. Priority spending order: Combo Multiplier upgrades > Power-up Slot unlocks > Power-up upgrades > Stat-boosting gear > Cosmetics.
5. Never Using Power-ups. Some players hoard power-ups, waiting for the "perfect moment" that never comes. Power-up cooldowns are short (30-90 seconds depending on the item), and they are meant to be used liberally. If your power-up is off cooldown and you are in a coin-dense section, activate it. The only exception is the Score Boost power-up — save it for long straightaways with heavy coin density where you can maintain a high combo multiplier.
Speed Leveling Guide — Hit Max Level in Half the Time
Your player level in City Run 3 gates access to characters, power-up tiers, gear slots, and competitive leaderboards. The journey from level 1 to 50 is the single most impactful progression track in the game, and optimizing your XP gain can cut the total time investment by an estimated 40-50%. This guide breaks down every XP source, ranks them by efficiency, and provides a daily task priority system that maximizes experience gains per minute of active play.
XP Source Breakdown: Where Your Experience Comes From
City Run 3 awards XP through seven distinct sources, each with different efficiency characteristics. Understanding the math behind each source lets you allocate your limited playtime to the activities that yield the highest returns:
Daily Quests (Primary Source): Every 24 hours, five daily quests appear in your quest log. These range from simple tasks ("Collect 500 coins," "Run 2,000 meters") to conditional challenges ("Perform 10 wall-runs," "Activate 5 power-ups in one run"). Quest XP scales with your player level: at level 1-10, quests award 200-500 XP each; at level 30-40, they award 1,200-2,000 XP each; at level 40-50, the top-tier quests can award 2,500-4,000 XP. Completing all five daily quests takes approximately 20 minutes for an experienced player and provides 60-70% of your daily XP intake.
Distance XP (Passive): You earn XP for every meter you run, at a rate of roughly 1 XP per 10 meters (0.1 XP/m). A 5,000-meter run yields about 500 XP from distance alone. This is low-efficiency compared to quests but adds up over long play sessions. Distance XP is boosted by 25% when using a character with Speed above 70.
Achievement XP (Milestone): The achievement system provides large one-time XP rewards for hitting specific milestones: first 1,000-meter run (500 XP), first 10,000 total coins collected (1,000 XP), unlocking a hidden level (2,500 XP each), reaching combo multiplier 10x for the first time (1,500 XP). There are 42 achievements in total, collectively awarding approximately 60,000 XP — roughly 40% of the total XP needed to reach level 50.
Event Bonus XP (Seasonal): During special events (typically one week per month), all XP gains are multiplied by 1.5x to 2x. Events also introduce event-specific quests that award 3,000-8,000 XP each. Prioritize playtime during event windows — a single event week with 2x XP can advance you 4-6 levels in the mid-game.
First Win of the Day (Daily Bonus): Your first completed run each day (minimum 500 meters) awards a bonus 300-800 XP depending on your level. This takes 2-3 minutes and should never be skipped.
Combo Chain XP (Skill-Based): Maintaining a combo multiplier of 5x or higher for at least 30 consecutive seconds triggers a "Combo Streak" bonus worth 100-300 XP. This bonus can trigger multiple times per run, making high-combo playstyles more XP-efficient than survival-focused play.
Friend Bonus (Social): Running with a friend's character as a "ghost" (their best-run replay) adds a 10% XP bonus to that run. The friend does not need to be online — you can select any friend from your list before starting a run.
XP Efficiency Comparison
| XP Source | XP per Hour (Avg) | Difficulty | Consistency | Priority |
|---|---|---|---|---|
| Daily Quests (all 5) | ~12,000 XP/h | Medium | Daily reset | Highest |
| Event Bonus (2x XP week) | ~16,000 XP/h | Varies | Monthly | Highest (during event) |
| Achievement Hunting | ~8,000 XP/h | Hard | One-time | High |
| Combo Streak Bonus | ~4,000 XP/h | High | Skill-dependent | Medium-High |
| First Win of the Day | ~2,000 XP/h (capped) | Easy | Daily | Medium |
| Distance XP (free run) | ~1,500 XP/h | Easy | Unlimited | Low |
| Friend Bonus (10% extra) | +10% to base | Easy | Requires friends | Supplemental |
Daily Task Priority System
Follow this priority order every time you log in. Higher-priority tasks provide more XP per minute invested. If you have limited playtime, work down the list until time runs out:
-
Check and Accept Daily Quests
Open your quest log immediately upon login. Read all five quests and plan which can be completed simultaneously. For example, "Run 2,000 meters," "Collect 1,000 coins," and "Perform 5 wall-runs" can all be done in a single run. Note any quests that are incompatible (e.g., one requires surviving a long distance, another requires activating power-ups frequently, which may cause risky behavior). Start with an easy quest to build momentum. Time: 1 minute to plan, 15-20 minutes to complete all five.
-
Claim First Win of the Day
Your first completed run (500m minimum) grants bonus XP. You will naturally complete this while working on daily quests — no need to run a dedicated "first win" attempt. Just ensure your first run of the day goes past 500 meters before you intentionally crash out. Time: 2-3 minutes (organic).
-
Check Active Events
Tap the Events banner on the main menu. If an XP boost event is active, reprioritize your entire session around maximizing runs during the event window. Event-specific quests should jump to the top of your priority list — they offer 3-5x the XP of standard daily quests. Time: 1 minute to check, then allocate remaining playtime accordingly.
-
Achievement Push (Target 1-2 Per Session)
Review your achievement list and identify 1-2 that are close to completion. The achievement tracker shows progress as a percentage. Focus on achievements within 80%+ completion — these provide the most efficient XP return for minimal additional effort. Leave sub-50% achievements for natural progression unless they align with your current daily quests. Time: 10-15 minutes per achievement.
-
Free Run with High-Combo Focus
If you have completed all quests and event content, spend remaining playtime on free runs optimized for combo streak XP. Equip Magnet and Double Coins to maintain coin collection chains, use a high-Combo character if available (Shadow Runner, Combo 90), and aim to keep the multiplier at 7x or above for as long as possible. Each 30+ second streak at 7x+ awards the combo bonus. Time: As available.
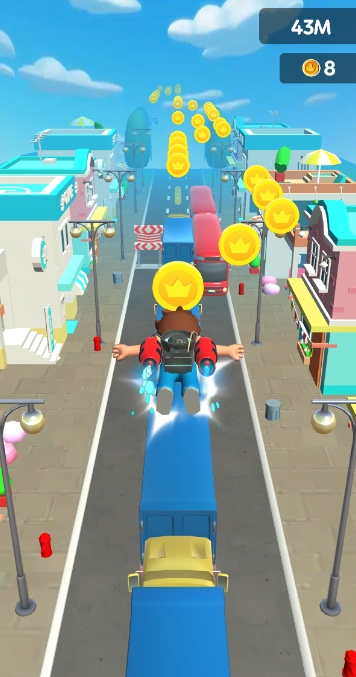
High Score & Combo System — Break Into the Leaderboards
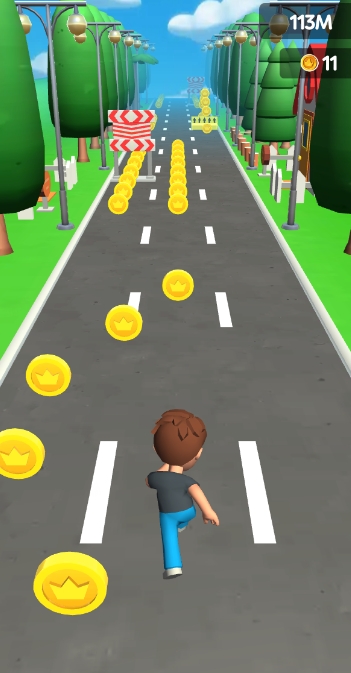
The gap between a casual run and a leaderboard-worthy score in City Run 3 comes down to one mechanic: the combo multiplier system. Understanding how the combo chain builds, how to protect it from breaking, and how to layer power-ups on top of a high multiplier transforms a 50,000-point run into a 500,000-point run. This guide decodes the exact scoring formula, provides frame-level combo maintenance strategies, and outlines the optimal coin collection routes on every map.
The Combo Multiplier: From 1x to 10x (and Beyond)
The combo multiplier is the heart of City Run 3's scoring engine. Every collectible you pick up — coins, power-up tokens, and bonus orbs — increments your combo counter by one. The multiplier increases at specific combo thresholds:
| Combo Count | Multiplier | Coins at This Tier (per pickup) | Score Increase vs. Base |
|---|---|---|---|
| 0-9 | 1x | 10 points | Baseline |
| 10-19 | 2x | 20 points | +100% |
| 20-29 | 3x | 30 points | +200% |
| 30-39 | 4x | 40 points | +300% |
| 40-49 | 5x | 50 points | +400% |
| 50-59 | 6x | 60 points | +500% |
| 60-69 | 7x | 70 points | +600% |
| 70-79 | 8x | 80 points | +700% |
| 80-89 | 9x | 90 points | +800% |
| 90+ | 10x | 100 points | +900% |
The Combo Multiplier Upgrade in the shop (purchasable up to level 5, cumulative cost: 8,500 coins) extends the cap beyond 10x. At upgrade level 5, you can reach a 15x multiplier at 140+ consecutive pickups. Each upgrade level costs: Level 1 (800 coins, cap 12x), Level 2 (1,500 coins, cap 13x), Level 3 (2,500 coins, cap 14x), Level 4 (3,500 coins, cap 15x), Level 5 (5,000 coins, cap 15x with extended combo window).
Critical Mechanic — Combo Break: Your combo resets to 1x if you go more than 2.5 seconds without collecting any item. This timer is generous on high-density coin paths but punishing on sparse sections. The combo break timer extends to 3.5 seconds with the Combo Multiplier Upgrade Level 5, giving you an extra second of forgiveness.
Coin Collection Strategy: Density Zones and Routing
Not all sections of a City Run 3 map are equal in coin density. Each district has designated "coin lanes" — sections where coins are clustered in specific patterns that can be efficiently collected with the right routing:
Industrial Zone: Coins appear in horizontal lines of 5-8 across all three lanes at roughly 100-meter intervals. The optimal route is a zigzag pattern: run center lane, collect the center coins, swipe left to grab the left-lane coins, then immediately swipe right twice to collect the right-lane coins. This three-lane weave collects all available coins in a single pass and builds your combo counter by 15-24 per cluster. Between clusters, stick to the center lane to react to obstacles from either side.
Night District: Coin placement is vertical rather than horizontal — coins float in columns of 3-5 at varying heights within each lane. The optimal strategy is to choose one lane and jump repeatedly to collect the vertical stacks. Lane-switching is less rewarding here because the columns are evenly distributed across lanes. Focus on the lane with the fewest obstacles (typically the right lane in the first half, center lane in the second half).
Downtown District: The most complex coin layout — coins form diamond patterns across all three lanes, with corner coins placed at jump height and center coins at ground level. The optimal route is a figure-eight pattern: start center, jump to grab the top diamond coin, slide to collect the bottom diamond coin, swipe left and repeat, swipe right and repeat. This pattern maintains full combo through the entire Downtown section when executed cleanly.
Scoring Formula Breakdown
The complete City Run 3 scoring formula, as verified through frame-by-frame analysis by the community testing group, is:
Total Score = Σ(Coin Value * Combo Multiplier) + (Distance in meters * 5) + Power-up Bonuses
Breaking this down: Coin Value is 10 points per standard coin, 50 points per large coin (gold-colored, appears in groups of 3), and 200 points per diamond coin (rare, appears once per 500 meters). Combo Multiplier is your current tier (1x-15x). Distance Bonus adds a flat 5 points per meter run, which accounts for roughly 10-15% of a typical high-score run's total. Power-up Bonuses include: Score Boost (2x all points for 15 seconds), Double Coins (coin value doubled, effectively a 2x multiplier that stacks multiplicatively with the combo multiplier), and Perfect Run Bonus (no crashes, no missed power-up activations — adds a 20% bonus to the final score).
In a top-tier high-score run, the typical contribution breakdown looks like: 65-70% from coin collection (driven by the 10x+ combo multiplier), 10-15% from distance bonus, and 15-20% from power-up bonuses including the Perfect Run multiplier. This means that coin collection and combo maintenance constitute over three-quarters of your total score — optimizing these two factors is far more impactful than simply running farther.
Power-up & Gear Guide — Optimize Your Loadout for Any Goal
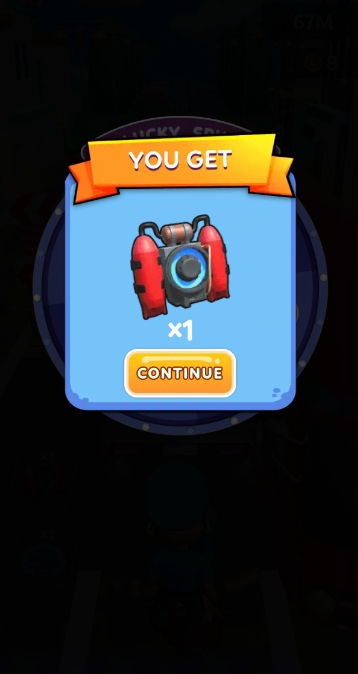
City Run 3 features six core power-ups, each with distinct effects, cooldowns, and upgrade paths. Your choice of which three to equip — and in which slots — defines your playstyle and determines your effectiveness at scoring, surviving, or speedrunning. This guide provides a complete breakdown of every power-up, three optimized loadout strategies tailored to different goals, and a full upgrade cost table so you can plan your coin spending efficiently.
Power-up Details
Magnet (Utility, Cooldown: 45s, Duration: 10s): Creates an electromagnetic field around your runner that attracts all coins and collectibles within range. Base radius: 3 meters. At max upgrade (Level 5): 6-meter radius, 15-second duration, and 35-second cooldown. The Magnet is the most versatile power-up in the game — useful in every loadout, every map, and every playstyle. It effectively removes the need for precise lane positioning to collect coins, letting you focus entirely on obstacle avoidance while passively vacuuming up every pickup on screen. The Magnet also attracts power-up tokens, meaning you can collect off-lane power-ups without deviating from your safe route.
Shield (Defense, Cooldown: 60s, Duration: 8s): Encases your runner in a protective energy bubble that negates one crash. If you hit an obstacle while the Shield is active, the Shield shatters instead of ending your run, and you continue running from the point of impact. Base: 1 charge. At max upgrade (Level 5): 2 charges per activation, 10-second duration, and 45-second cooldown. The Shield is essential for survival-focused runs and for attempting hidden level unlocks where obstacle density is punishing. Note: the Shield does not protect against falling off edges or missing mandatory jumps across gaps — it only absorbs direct obstacle collisions.
Speed Boost (Mobility, Cooldown: 50s, Duration: 8s): Increases your runner's speed by 50% for the duration. Base: 50% speed increase. At max upgrade (Level 5): 80% speed increase, 12-second duration, and 40-second cooldown. Speed Boost compresses the game world — obstacles arrive faster, requiring quicker reactions, but you also cover more distance and encounter more coin clusters per second. It is the highest-risk, highest-reward power-up. Speed Boost stacks with the Jetpack — using both simultaneously (your runner flies at 180% base speed) is the fastest possible traversal method in City Run 3.
Double Coins (Economy, Cooldown: 55s, Duration: 10s): Doubles the value of every coin collected while active. Base: 2x coin value. At max upgrade (Level 5): 2.5x coin value, 15-second duration, and 40-second cooldown. Double Coins is the cornerstone of high-score loadouts because the coin value multiplier stacks multiplicatively with the combo multiplier. A coin worth 10 base points, collected at 10x combo with Double Coins active, is worth 200 points (10 * 10 * 2). At 2.5x with a 15x combo cap, a single coin can be worth 375 points.
Jetpack (Mobility, Cooldown: 70s, Duration: 6s): Launches your runner into the air, bypassing all ground obstacles and collecting aerial coins automatically. Base: 6-second flight at 2x jump height. At max upgrade (Level 5): 10-second flight, 3x jump height, and 55-second cooldown. While airborne, you are immune to all ground-level obstacles (barriers, low walls, oncoming traffic) but must still dodge aerial hazards (drones, hanging signs, birds). The Jetpack is the safest way to traverse high-obstacle-density zones and is essential for speedrun strategies that skip entire obstacle sequences.
Skateboard (Mobility/Defense, Cooldown: 40s, Duration: 12s): Summons a neon skateboard that increases base speed by 30% and grants immunity to one crash (similar to Shield, but the skateboard absorbs the hit and then disappears). Base: 30% speed, 1 crash immunity. At max upgrade (Level 5): 45% speed, 2 crash immunities, 15-second duration, and 30-second cooldown. The Skateboard is unique in providing both offense (speed) and defense (crash immunity) in a single slot, making it the most slot-efficient power-up. It also extends wall-run duration by 2 seconds — the only power-up that directly modifies a movement mechanic.
Three Loadout Strategies
Loadout 1: Score Hunter (Goal: Maximize single-run score)
- Power-ups: Double Coins (Slot 1), Magnet (Slot 2), Speed Boost (Slot 3)
- Recommended Character: Shadow Runner (Combo 90, built for scoring)
- Strategy: Activate Double Coins and Magnet simultaneously when entering a coin-dense zone (Industrial Zone's horizontal coin clusters, Downtown's diamond patterns). The Magnet ensures you collect every available coin, and Double Coins doubles their value at whatever combo multiplier you have built. Use Speed Boost between coin zones to reach the next cluster faster, compressing more coin-collection opportunities into the power-up duration window. Save your Score Boost item (separate from power-ups, earned through daily rewards) for runs where you have maintained 10x+ combo for at least 30 seconds.
Loadout 2: Iron Runner (Goal: Maximum survival distance)
- Power-ups: Shield (Slot 1), Magnet (Slot 2), Skateboard (Slot 3)
- Recommended Character: Default Runner (balanced stats, forgiving handling)
- Strategy: This loadout prioritizes staying alive above all else. Keep Shield ready for high-obstacle-density sections (the Bridge Sector gauntlet, the Night District's narrow alley sequence). Use Magnet to passively collect coins without risky lane changes. Deploy Skateboard during long straightaways — the 30% speed boost helps you reach coin clusters faster, and the crash immunity provides a safety net. When Shield and Skateboard are both on cooldown, play conservatively: stick to the lane with the fewest obstacles, avoid unnecessary lane switches, and prioritize survival over coin collection until a defensive power-up is available again.
Loadout 3: Speed Demon (Goal: Fastest level completion / speedrun)
- Power-ups: Jetpack (Slot 1), Speed Boost (Slot 2), Skateboard (Slot 3)
- Recommended Character: Swift Runner (Speed 85, highest base speed)
- Strategy: This loadout sacrifices all defensive utility for pure velocity. Activate Skateboard and Speed Boost together for a combined 95% speed increase at max upgrades (30% + 80%, stacking additively). Save Jetpack for sections with unavoidable obstacle clusters — flying over them saves more time than dodging. The key to this loadout is preemptive power-up timing: activate Speed Boost before entering a known high-speed section so it is already at full effect when you hit the dense coin clusters. With Swift Runner and all three mobility power-ups active, your runner moves at nearly 3x base speed — reactions must be near-instant.
Power-up Upgrade Cost Table
| Upgrade Level | Coins Required | Effect | Player Level Required |
|---|---|---|---|
| Level 1 (Unlock) | 500 | Base effect unlocked | 1 |
| Level 2 | 1,200 | Duration +2s OR Cooldown -5s | 5 |
| Level 3 | 2,500 | Effect magnitude +25% | 15 |
| Level 4 | 5,000 | Duration +3s + Cooldown -5s | 25 |
| Level 5 (Max) | 8,000 | Effect magnitude +50% (total), max stats | 40 |
Total cost to max one power-up: 17,200 coins. Total cost to max all six: 103,200 coins. This is an endgame coin goal — focus on maxing your three most-used power-ups first (typically Magnet, Double Coins, and your preferred mobility option) before spreading coins across the full roster.
Advanced Speed Techniques — Run Like the Top 1%
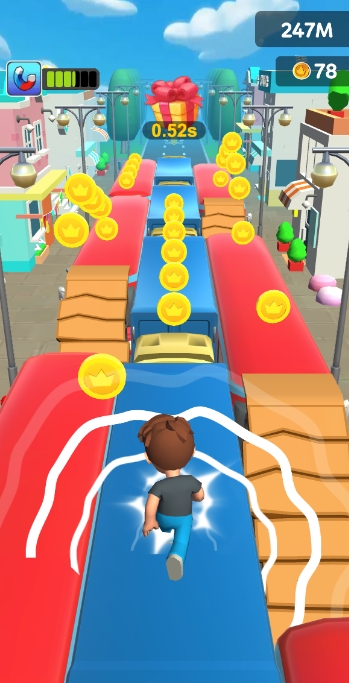
Once you have mastered the basics — surviving past 3,000 meters, maintaining combos above 8x, and unlocking the hidden levels — you enter the realm of advanced techniques. These are the movement optimizations, frame-level input tricks, and strategic decisions that separate the top 1% of City Run 3 players from everyone else. The techniques in this guide are mechanically demanding and require hours of practice to execute consistently, but they are the difference between a top-500 score and a top-10 leaderboard placement.
Corner Jumps: Defying the Lane System
A corner jump exploits the game's collision detection at lane boundaries to achieve a jump height roughly 40% higher than a standard jump. The technique works because City Run 3's physics engine calculates jump trajectory from your runner's exact position — and at the corner between two lanes, the engine applies jump force from both lanes simultaneously, stacking the vertical momentum.
Execution: Slide into the corner where two lanes meet (e.g., slide from center lane into the center-right boundary). At the exact moment your slide ends and your runner stands up at the corner position, input a held upward swipe (not a quick flick — you need the full jump height). If timed correctly, your runner launches higher than normal, clearing obstacles that are designed to be impassable with standard jumps. The timing window is approximately 0.2 seconds — practice this in the Industrial Zone where tall smokestack obstacles provide clear visual feedback for whether you cleared them.
Applications: Corner jumps let you skip entire obstacle sequences by jumping over them. In the Downtown District, a corner jump at the intersection of lanes 2 and 3 can clear a 3-obstacle cluster (low barrier + tall barrier + hanging sign) that would normally require a slide-jump-slide sequence. In speedruns, mastering corner jumps reduces the Night District completion time by an estimated 8-12 seconds.
Z-Direction Changes: Breaking the Lane-Switch Cooldown
Normally, City Run 3 imposes a ~0.15-second cooldown between lane switches — you swipe left, your runner moves, and you cannot input another lane change until the animation completes. Z-direction changes bypass this cooldown by chaining a swipe with a power-up activation, which resets the animation state and allows an immediate second lane switch.
Execution: Swipe to change lanes, and at the midpoint of the lane-switch animation (roughly 0.08 seconds in), double-tap to activate any power-up. The power-up activation cancels the remaining lane-switch animation frames, and your runner instantly arrives in the new lane. You can then immediately input a second lane switch. The net effect: you can switch from far-left to far-right lane (normally requiring two separate swipes with a cooldown between them) in approximately 0.15 seconds instead of 0.5+ seconds.
Applications: Z-direction changes are critical for navigating the Bridge Sector's "impossible gauntlet" — a sequence where obstacles appear in all three lanes within a 1-second window. Without Z-direction changes, this section is mathematically unsurvivable without a Shield. With them, you can weave through all three lanes faster than the obstacles can track your position.
Animation Cancel: Skipping Recovery Frames
Every action in City Run 3 has recovery frames — the brief period after an action completes where your runner cannot input a new action. A standard jump has 0.3 seconds of recovery frames upon landing; a slide has 0.25 seconds. Animation canceling skips these recovery frames by interrupting them with a power-up activation, allowing you to chain actions faster than intended.
Execution: Perform any action (jump, slide, wall-run dismount). At the moment your runner's feet touch the ground (for jumps/slides) or connect with the wall (for wall-runs), double-tap a power-up. The power-up activation overrides the recovery animation, and your runner can immediately perform another action. The timing varies by action: jump landing cancel window is approximately 0.05 seconds (very tight), slide recovery cancel is approximately 0.08 seconds (slightly more forgiving).
Chain Example: Jump over a barrier, animation-cancel the landing with Magnet activation, immediately slide under a low barrier, animation-cancel the slide recovery with Speed Boost activation, immediately jump again. This sequence — jump-cancel-slide-cancel-jump — executes three actions in the time normally required for two, giving you an extra dodge in tight obstacle sequences.
Edge Detection: Running on the Outer Limits
City Run 3's lane system is not as rigid as it appears. Each lane has a width of approximately 2.5 in-game meters, and your runner's hitbox is about 1 meter wide. This means you can position your runner on the extreme left or right edge of a lane, effectively creating a "half-lane" position that dodges obstacles that target the lane center while keeping you closer to the adjacent lane for faster lane switches.
Execution: Instead of swiping fully between lanes, use a very short, quick swipe — about half the distance of a normal lane-change swipe. The game interprets this as a "micro-adjustment" rather than a full lane change, and your runner shifts to the edge of their current lane rather than moving to the next lane. This technique requires practice to develop the muscle memory for the correct swipe distance, and it is easier on devices with larger screens where small swipe differences are more distinguishable.
Applications: Edge positioning is most powerful in the Night District, where obstacle hitboxes are narrower due to the district's tight-corridor design. Running on the right edge of the center lane lets you dodge center-lane obstacles by a margin of about 0.5 meters while staying close enough to the right lane to switch into it instantly if needed. Pro players use edge positioning to maintain what the community calls "lane-and-a-half" control — effectively being in two lanes at once for defensive purposes.
Speed Mode Strategy: Pacing Your Power-ups
City Run 3's Speed Mode (unlocked at level 20) increases the base game speed by 40% and reduces power-up cooldowns by 25%, creating a fundamentally different gameplay rhythm. Strategies that work in Normal Mode fail in Speed Mode because the reaction windows shrink proportionally. Here is how to adapt:
Preemptive Input: In Speed Mode, reactively dodging obstacles is no longer viable — by the time you see an obstacle and process the correct dodge input, you have already traveled 5-8 meters closer to it at the increased speed. Instead, memorize obstacle patterns for each district and input your dodge before the obstacle enters the visible danger zone. Top Speed Mode players operate about 0.5 seconds ahead of the game's visual feedback, essentially running on prediction rather than reaction.
Power-up Rotation Discipline: With 25% faster cooldowns, you can cycle through power-ups more aggressively in Speed Mode. The optimal rotation: Magnet (activate immediately, 26-second cooldown in Speed Mode), Speed Boost (activate when Magnet expires, 30-second cooldown), third power-up based on loadout (activate when Speed Boost expires). By the time the third power-up ends, Magnet is off cooldown again. This creates a near-continuous power-up coverage where at least one power-up is always active.
Hidden Level Runs in Speed Mode: Speed Mode increases coin and XP rewards by 1.5x across all content, including hidden levels. The Underground Arena at 3x XP, combined with Speed Mode's 1.5x multiplier, yields 4.5x base XP — making a Speed Mode Arena run the single most XP-efficient activity in City Run 3. However, the Arena's obstacle density in Speed Mode is punishing. Only attempt Speed Mode Arena runs after mastering all four advanced techniques above (corner jumps, Z-changes, animation cancel, and edge detection).
Our guides are continuously tested and updated to reflect the latest game patches and community discoveries. If you have found a strategy not listed here, or if you believe any information is outdated, please reach out through our Contact page. We credit all community contributors whose strategies are incorporated into our guides. Last reviewed: July 3, 2026.